El command block is a way of running commands to help maintain Creative mode, SMP automation, and custom maps. To learn more about the block in detail, visit the Command Block page. It is a good idea to look, although the command block is isolated by means of a base stone, the block can be accessed with hacks such as freecam or one that allows moving to any specific coordinate using ender beads, if they access the command block, OPs can be given.
Summary
- 1 Apps in Single Player mode
- 2 Elevator
- 3 Mobile Bench
- 4 Eternal Day
- 5 Wireless Redstone
- 5.1 Starter Kits
- 5.2 Replacement of pressure plates
- 5.3 Using command blocks in non-creative Single Player maps
- 5.4 Creation of Adventure Maps
Single Player Mode Applications
Command Blocks can be used in single player to change the difficulty, change the weather, or give you predesigned items. They are particularly useful for the / weather and / time set x commands, as they are only available in cheat mode. The / time set x command is especially useful as it allows you to change the current time to a preset time with the press of a button. Command blocks can also be used to make text appear in the person's chat menu. To do this, dig 2 blocks in the ground, place a command block at the bottom of the hole, type this in the command block: tell @p or tell me then put a block on top and put a pressure plate on that block. If you wrote @ p, only whoever steps on the pressure plate will receive a message. If he wrote when you or any other action that the person in it everyone who the username is going to send the message: @ whispers to you: in that text form. You can also write: tell @py every time someone walks on it they will say: @ whisper to you: . If a mob steps on the pressure plate it will say the username of the person closest to the command block, and if you want to change the difficulty then do it / difficulty x and use 0-3 or the name of the difficulty (for example / difficulty peaceful). Another way to use command blocks in single player is to use / tp @p to warp between different bases in your world. You can use the warp by feeding the command block.
Lift
You can also make use of an elevator / tp ~ 0 ~ y ~ 0, where y is the vertical difference between the upper and lower elevator entrances. The lift can also be made to TP a player to any XYZ coordinates by simply leaving out the ~ before the numbers. When ~ is left in the command, the normal xyz is set to 0 0 0 where the command was made, such as placed on a pressure plate or where the player is standing when the command block received power. If a pressure plate was at the xyz coordinates of -36 96 -12 running to a command block with a command from / tp @p ~ 3 ~ 4 ~ 5 it would tp the player at the coordinates of -33 100 -7 . The same result can be achieved by making the command / tp @p -34 100 -8 a block must be subtracted from the X and Z axes to arrive at the correct coordinates. Security system for players
Mobile stool
A concept similar to the elevator, but made to move a player along the x or z coordinates. This can be created by:
Build a strip of obsidian Place a command block in the middle of the main avenue and type this command:
/ tp @p ~ 1 ~ 0 ~ 0 [r = (sidewalk length / 2)] to move along the x-axis, or / tp @p ~ 0 ~ 0 ~ 1 [r = (sidewalk length / 2)] to move along the z axis
Attach the block to a clock
This will make it look and act like the person is on a moving sidewalk. It's going to be very noisy unless you first turn the command block output off. / gamerule commandBlockOutput false
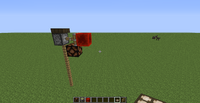
Eternal day
Reseter Time. Png
Note: As of 13w24a, there is a gamerule, doDaylightCycle, that can be used to get eternal day by typing in chat, / gamerule doDaylightCycle false, and then "set / hour 6000".
By using the cobweb and a wagon, you can skip the use of nights / time set 0. It takes 31 seconds for a minecart to fall through a spider web. Therefore, by using 23 stacked cobwebs with a Rail Detector and several Rail Powered you will keep the sun in the sky.
Alternatively, you can use a de-spawning element on a wooden pressure pad. The spawn item off the pad every 5 minutes, at this time a command block reset is triggered at 0 times, a dispenser (or a dropper) is also triggered to drop a new item on the wooden platform. 5 minutes is the day cycle and will activate before mobs spawn. This method, however, is limited to 64x9 = 576 cycles = 48 hours IRL of play with that chunk loaded. In the snapshot 13w01a and above, the hoppers are added in the game that can collect items and deposit them in blocks with an inventory. A peat grinder can keep the dispenser filled with gunpowder, arrows, and zombie meat. Another technique is to simply use a command block to create the item from scratch (for example: / summon Item ~ 1 ~ 0 ~ 1 {Item: brown_mushroom}). The advantage of this is that you don't have any item limits like using 64x9 dispensers there.
Both of these methods require the chunk you are going to load to allow the system to work.
Alternatively, you can connect the command block to a repeating redstone pulse, such as a five-hour, some kind of loop, or a daylight sensor as seen to the right. To prevent this from filling up the chat window, set the gamerule "commandBlockOutput" false with the command / gamerule commandBlockOutput false. Note: This method can be used to set a variety of things by using a different command. (IE have eternal sunshine, add another command block to the loop and use the / weather clear command)
Also, to make it switch-able, use one of these layouts, but put Y Gate before the command block, with a lever on one side, and the mechanism on the other side.
Using the daylight sensor block is a more direct approach to the everlasting day.
Automatic time Resster view 1.png Automatic time Reseter view 2.png
The sensor disables the Redstone torch which will activate the command block, which will set the time to 80.000 when there is not enough light for the sensor to power the Redstone torch across the distance. In other words, the command block will set the time until noon, when it is dark enough. The light level when the command is activated varies with the distance of the Redstone wire. The time that is set that varies with the time written in the command block.
Automatic Time Reseter View 3.png
To do this, first, the daylight sensor is placed in an open area. Then some Redstone wire is placed away from it. Redstone wire distance depends on your need for precious time. You can only take a maximum of 15 blocks of Redstone wire worth away from the daylight sensor to send the signal to its destination. Next, you put a block at the other end of the Redstone. Put a Redstone torch on the side of the block and a command block on top of the torch. Right click on the command block and start with "set / time" and enter a valid time value and end. The value depends on when you want to set the time for. 14000 is night and 8000 is noon.
Automatic Time Reseter.png
This design can be used on maps to maintain a certain time of day / night. This simple gadget can only be used in creative mode or when Cheats are enabled.
There is an alternative, a more compact design. If you put a comparator facing away from the sunlight detector and a 15 force redstone line (a redstone with a torch) on the second input. Then set the subtraction mode comparer. The comparator will be activated immediately after noon. wireless redstone
Wireless RedstoneWireless Redstone can be achieved in vanilla Minecraft using command blocks and the system scoreboard. The process involves the use of a marker variable that is searched by a command block connected to the output of a clock circuit. A comparator is then used in the wireless output command block that will activate when the variable is true.
Wireless Redstone can also be achieved by using targets instead of variables. If the exit command block is set to try to remove a non-existent target, a redstone signal can be created by adding said target via the command block or the chat command. The advantage of this method over the variable method is that it is not dependent on the players.
To do this, put a command block at the input and type the command: targets / marker add mannequin name> , connect it to a clock, and put a comparator then a repeater that comes out of the command block. Then you just have to use the repeater as an output.
Off state.
In state.
The status command.
Off state command.
Wireless output configuration.
Wireless exit command.
Another way to have wireless redstone using the "/ summon" command. The command used here is / summon FallingSand -118 150 -60.5 {TileID: 76, Time: 1, DropItem: 0}
As of 1.7 you can achieve wireless redstone even easier by using the setblock commands instead of the dialer system. All you have to do is let the command block set a redstone_block to the destination coordinates - along with an air block that is set to the same coordinates as a command block connected to the inverted signal.
Starter Kits
By using m =, you can make a team into a custom map / server that you can only get once! First, dig 3 squares in the ground and place in a row of command blocks (one for each item in the kit). In the graphical user interface, the type / give [m = ] . Do this for each item you want to give. Make an extra command block that has the / gamemode command , then chain redstone through all the command blocks (this can easily be done by sneaking and dropping). Fill in the hole and place a pressure plate over it. When players stand on it, their children will receive the desired kit of items and it will change their gameplay so that they can never receive any more (unless cheats are used) (Note: This method can also be done using the use the above method using only (First the name of your kit no / scoreboard objectives add dummy ) marker commands! / give @p [score_ = 0] for the row of command blocks that gives you the elements and / scoreboard players add @p for a single use. Also you can make more than one kit by repeating the steps and using a different). As a replacement for pressure plates
Pressure plate replacement
Don't you hate how there are only 4 materials that pressure plates mix with? (Stone, oak, iron and gold) Now you don't have to deal with that. Pressure plates can be replaced by a command block using the "testfor" command with a scope and a clock circuit. The command / testfor @p [r = 2] will test to see if the players are in a range of 2 (the command block itself plus 2 more blocks in each direction). Rank 2 is the rank you want for a command block on a floor. Note that a balloon-shaped trigger area will be produced (rather than a cube), so a range of 2 makes an area of about 5x5x5 and a range of 1 makes a 3x3x3 zone (more like a + pattern with an extra block above and below the center). You can avoid this by using the dx, dy, and dz arguments. Alternatively, you can specify the xyz coordinates in your code (eg / testfor @p [x = 50, y = 64, z = 46, r = 1], but note that you cannot reduce the distance to the point 1-block. As with the non-xyz version range, it means middle block plus the serial number of blocks around, which makes sense from a command block (where "just the middle block" would mean you have to be right? foot in the command block), but it doesn't make sense here. In any case a range of 1 sphere (+ pattern with an additional block at the top and bottom) can be buried underground with only the top sticking out, always You know that no one is going to walk on the bottom 2 layers of the globe. Trying this with the non-xyz version of the code would require the command block itself to be embedded on the surface of the floor, where you can observe one last drawback: this. does not have to satisfactorily trigger sphincter squeeze sound that pressure plates have :).
Edit: spotted the solution in a YouTube video. If you intentionally cause an integer overflow using the number 65536 in the range that wraps around and shrinks to 1 block. Edit 2: Fixed in 1,8 snapshots. Now use range 0. Using range 65.536 will now actually search for that range instead of overflowing.
Using command blocks in non-creative Single Player maps
By swapping game mode it is possible to use command blocks in single player outside of creative mode. Just by switching to creative mode with the / game mode 1 knob, set the command block command to whatever you want, and then switch back to / game mode 0. The command block should only be set creatively, but it will still work once back to normal.
It can also be used to teleport to certain areas (eg a distant Fortress, a deep mining operation, or a floating island). If you took a very long time to get there, and if you don't mind some kind of cheating, then you can create a teleportation system. Make sure you are in creative mode by setting that (use command / game mode 1. If you don't have cheats enabled, open the LAN and set cheats on), but you can still enable it in Survival mode. Type this command as soon as you have the Lock GUI open / tp @ PXYZ command. Then activate the command block with redstone (including buttons, levers and pressure plates), and you will be sent to your distant destination. You can configure several different teleports. This can also be used when doing a large project that is spread over a very large area or if you are transferring the chest from an old home to a new home.
Creation of Adventure Maps
If you want to create a single player adventure map, do not / publish for all the other commands (see below) to be used. Multi Player applications (SMP)
This section details the command block applications in multiplayer mode.
*Teleportation / Transport
By means of / tp, one can create public use teleporters on a server. It can be applied to a wide range of scenarios. For example, you could make a portal system in a particularly large world in which all portals link to a central cube, which contains portals to all other portal locations creating a kind of "fast travel hub"
*Stop-Motion Animation
By using / tp and an external Minecraft world editor program like mcedit you can copy a landscape, paste it in a distant location, and change a few blocks. Wire a pressure plate or tripwire at each site, so that after a short delay to admire the scenery, the player is teleported with the / tp command on the command blocks. If a large number of these copied and altered locations are wired so that the player teleports to them in sequence with a slight delay between each, then this creates the illusion that the landscape around the player is moving, similar to the techniques used. at the stop -motion animation.
[Note that if you are using 1.8 or its snapshots, you can use / clone with a bunch of different copies of it, bit by bit, slightly altered, and then just clone the areas in one place sequentially. This way the player does not have to be teleported, but the surrounding landscape can be animated as the Copy commands duplicated the different animation "frames" near the player sequentially.]
Lottery
By means of / give @r, you can create a lottery. Note that now, / give will directly put the items into one's inventory, rather than dropping them on the ground in front of the character.
LotteryII
As mentioned above you can create a lottery, but that lottery is usable by the public. A simple modification can change that ... First create a new objective. (For example: / scoreboard objectives add Lottery dummy Lottery) Then use this command in a / scoreboard players add command block lottery 1 to introduce players to the lottery then / give @r [score_Lottery_min = 1] to start the lottery and only the players you choose can be in the lottery!
Dkye
By rigging a clock to a command block and using / tp a lot, you can force a player to stay in a certain location. If you do this, it would be advisable to either disable the commands in the chat settings or do / gamerule commandBlockOutput false. Using the parameter "minimum rank" and "rank", you can have it teleport players back only when they are at a certain distance.
Alternatively, giving players certain status effects at high levels with the / effect command can mimic the effect of a jail. Use / effect @p 2 128 to keep the player from moving and / effect 4 127 to keep the player from breaking things. If you really want a kick to a higher level, poison the player (use one of the two commands above, but replacing the first number with 19).
Administration only
With the parameter [m = 1], only players in the creative will be affected by the command block.
Fun anti-creative cheat mode
If you put a command block connected to a redstone pulse you can set tp @p [m = 1] ~ 0 ~ 1 ~ 0 hilarious results. This could be a way to creatively get people to switch to survival and it's also a lot of fun to watch.
News
By using / me in a command block you can create ads that could play even when the admin / owner was not there.
Security Scan
By using / clear, you can scan people for articles. If you want to remove certain items I use / clear @a (or ) . For example, on a server that doesn't want griefing you could have a clock connected to a command block to set / clear @a 259.
Racing referee
Using / say @p, the command block can inform the closest player. If the command block is placed after a finish line, it will say the finalists in order. As of patch 1.7, you can also do / tellraw @ p "THIS IS A MESSAGE", and when the message "This is a message" is triggered it will be raised in the chat system.
Creative Area / World Guard
Creating a "Creative Only" zone is possible through command blocks, but is complex and on more than a case-by-case basis. The basic idea would be to create a "fence" of the affected areas of command blocks so that, once a player creatively goes through it, they can switch to survival or adventure mode. A "World Guard" zone would be much simpler, there is only one command block make / gamemode 2 @a [xyzrm] and when people leave, there is only one button to switch to survival.
Improved PvP without Plug-Ins
You can use / gamerule keepInventory true that players cannot steal items from others. Also, use / spawnpoint [xyz] and / tp [xyz] to help move players around while in PvP competitions.
You can easily give people a one-button starter kit without plug-ins: "/ give @p [r = 2] 274". To prevent people from pressing the button a second time and again getting your kit you can make two command blocks activated in order :. 1 "/ give @p [r = 2 m = 2] 274" 2. "/ Gamemode 0 @p [r = 2]"
Special colorful words
Although you are not directly able to get color / italic / bold text when typed in the system GUI block, via mcedit filters you can edit the text to have those properties just like the plug-in form. ins change chat text properties on servers. mcedit SethBling Filter: ColourCommandBlockText
Alarm system
When a player approaches a pressure plate, a command block can be triggered with / say @p.
Remove players
Using maximum coordinates and parameters he can teleport everyone within one area to another specific area.
Rooms reward
If a certain player has been very good, average, or useful to the server, but not quite meeting the requirements to be promoted to an administrator, you could have a room full of buttons connected to command blocks with beneficial effects, like giving the helpful player a pile of diamonds or bedrock block, then connecting it to another command block, sending them to the spawn point. (It is very important this room is reinforced with bedrock, hidden, and can only be achieved by teleporting to its coordinates to avoid abuse).
Machine time
(Command: / toggledownfall and / weather thunder (to start or stop a thunderstorm)) Assuming only admins can get to it, a time machine can be very useful, which can rain down on and off at will. One of the most useful applications of this technique would be to use a combination of villagers and some kind of redstone machinery to create and automatic rain neutralizer, this would allow you to shut up from the rain almost immediately, without using the command , or to have an administrator present. It can also be used to create and / or end, a scenario in which it is more advantageous to have rain as opposed to sunlight, and vice versa; for example, during a forest fire, or monsters when a storm is spawning.
Obstacle course awards
with tp @pxyz and give @p itemname, you could make an obstacle course or maze that when finished will give a player a prize, and transport them back to spawn or some other area.
time Machine
By making two similar locations on a map, you can have a button trigger a command block to tp from one to the other, while changing the time of day. This can be used to look like time travel.
Proximity Mine
By using a condition like / testfor @p [r = 5, name =! ] hooked to a short clock and one or more TNT blocks via a comparator, the command block can act as an undetectable proximity mine against all players except the placement player.
Safe Doors
By using a condition like / testfor @p [r = 5, name = ], the command block can detect the owner of a door within a certain radius and open a door for them, and only for them.
Infinite elements in survival
As of snapshot 13w36a, you can put NBT tags in the / dar command. You can get an infinite stack of blocks by typing / give {amount = -1} / give {amount = -1} in a command block. Application on custom maps
This section details the command block applications in custom maps.
One map that takes advantage of many of the command block features is SethBling TF2 Street Map "Dustbowl" in Minecraft.
http://www.youtube.com/watch?v=_f2brU8hBWc&feature=plcp
Another example is that of the Hypixel Gladiator Arena in which the combat system is almost unique based on the command block.
http://www.youtube.com/watch?v=jryJkWcqmzM
Silent Lock command
Sometimes it is more important on a map to keep the command blocks silent, either to keep the magic of items that suddenly appear in inventory, or because the channel says the player was teleported, the state of mood of a map. To keep them silent (except when asked to speak), just use the false / gamerule commandBlockOutput.
Safe Haven / Arena Zona Lucha
Using pressure plates or tripwire, make areas (like a castle, for example) a different difficulty (for this example I'll use peaceful). the gates may have tripwire connected to a command block that changes difficulties to peaceful, creating a kind of "Safe Haven". one could also do it the other way around, creating a more dangerous area, such as arenas that have the difficulty of hard, rather than normal or easy.
Detecting cheaters
With the parameter [m = 1], you can affect those in Creative, or survival with the parameter [m = 0].
It's bigger on the inside
This is simple, there is only one command block system ing tp-in the entry / exit of one place, and the interior can be built in another place, allowing you to fool space restriction. (Example of use: you want interior walls to be wool, but exterior walls to be wood (normally 2m thick walls) You can make the outside of the house be 8x10 m, and the inside of the house will be 8x10 m.) . Or, they have the inside of the house instead 20x20m!
Save the game
By using the / spawnpoint command, you can easily make a button-activated checkpoint.
Lava Parkours
As said before, there is no command that makes the player able to keep their inventory on death: / gamerule keepInventory true. Simply connect it to a pressure pad below a parkour grade over lava and you don't have to use any type of chest minecart (especially useful when the player has their full inventory, which is larger than a single chest).
Do you still want a bed?
It is true that the / spawnpoint command is very useful, since you don't have to wait for the night to create a checkpoint, but what if you want to have a BUD switch connected to the bed or something like that? Then you just have to have a pressure plate (it's more discreet) connected to a block with the / time set 18000 command, and it will set the time at night so the player can sleep.
The weather and the weather behind the scenes
Let's say your map starts on a cold stormy night and when the player starts, for some random reason, there is a bright sun outside! Or what if you want to start on a bright day and the rain decides to join you along? Fear not, because there is a weather command. Just use the system's / weather input with, as input, clear, rain or thunder. Along with this, you can also use / time set input with a phone number as input: 23250 is sunrise, 6000 is noon, 12750 is sunset, and 18000 is midnight.
Detection of the players who switched to Pacifica
Create a hostile mob (so it disappears when switched to Peaceful) that never despawns if the player is far away. To do this, use a name tag on the mob (or third party software if you are playing on a version earlier than 1.5.2) and place it on a pressure plate. Make sure infinity will be held down, so make sure they can't jump or move away. Make a redstone circuit that causes a command block to activate when the pressure plate input ceases to exist. Places a message inside the block informing the player in chat that the map has been broken and must be redownloaded. In this way, the change to Peaceful will cause the mob to disappear and activate the message. You can even do a teleport command block so that a cheater is banished from the map to a small dead-end room as soon as they switch to the Pacific.
Talking Adventure map (with an easy Quest system!)
The / say command is very useful because it makes a text appear in the chat. It is perhaps one of the biggest uses of the command block, since you don't need silly samples or long books to show the rules of the game. Just put a bunch of command blocks in lines with repeaters set for two or three ticks (so the player isn't getting bombarded by mail) and a cabinet with books or a bunch of signs can easily be removed.
Another use of the command is speaking NPCs and other mobs. Imagine that you walk into a butcher shop and you want the butcher to say something. Before, you need to use signs or books, using a little space in a butcher and putting objects that sometimes seemed random, but now ... You just have to use the command / say and the butcher will speak to you. Maybe a pig behind the counter even begging for mercy! Let's take another example: you are in a factory and an alarm suddenly rings and says it is going to explode. Having him in the chat, especially if the text is long, keeps the mood stressful; the same works for bomb timers. The player will get more in the mood of the map if the chat screens '10 ... 9 ... '' 8 ... 'as well.
Last but not least, it makes it easier to create a Quest System. Let's say the player goes into a butcher shop. It is activated through a pressure plate connected to a NOR RS Latch (so it cannot be activated twice) and a command block with the / say command in which the butcher asks for help from the player: he he has to kill a pig (it's his fault). The player reaches the pig who is standing on a stone pressure plate, which turns off when the pig is dead. Thus, when the player returns to the carnage, he activates another circuit that contains yet another RS NOR Latch and two command blocks with two commands. First, the / say command in which butchers thanks the player, and the other, the / give command, for which the player gets the reward. Along with that, don't forget to use the @p command so the butcher says the player's name. For example, if the command block is set to do this: / say Thanks, @p. You helped me a lot killing that pig. / say Thanks, @p. You helped me a lot killing that pig. , the channel will say: "[@]: Thank you, You helped me a lot to kill that pig. ". This makes the map much cooler and it looks like it is made for the player as it says his / her name! You can also change [@] into [Butcher] by changing the name of the say / command block using an anvil.
Make a shop
By using / give @p [lm = (level)] (item) (amount) and / xp - (level) l @p [lm = (level)] you can make a store system that sells a certain amount of exp for articles. For example, if you made a command block with / give @p [lm = 5] 2 64 and another with / xp -5l @p [lm = 5] connected to the same redstone stream, it would take 5 levels from the player , and, in return, they give them 64 blocks of grass.
Subtracting XP can work like a coin, using the command / xp -3l @p [lm = 3], where l (L for level) is subtracted. The minimum xp for the work order can be listed inside the brackets, where lm is short for the minimum level required. !!!!
Shop Part 2: Custom Villagers
Custom villagers that sell whatever you want can be created with command blocks. por ejemplo: /summon Villager ~-2 ~0 ~0 {Profession:3,CustomName:BLACKSMITH,CustomNameVisible:0,Offers:{Recipes:[ {maxUses:13,buy:{id:388,Count:5},sell:{id:283,Count:1,tag:{ench:[{id:16,lvl:9},{id:20,lvl:6}],display:{Name:Molten Gold Sword}}}},{maxUses:13,buy:{id:388,Count:1},sell:{id:280,Count:1,tag:{ench:[{id:16,lvl:5}],display:{Name:Whuppin Stick}}}},{maxUses:13,buy:{id:388,Count:2},sell:{id:369,Count:1,tag:{ench:[{id:16,lvl:5},{id:20,lvl:10}],display:{Name:Radioactive Whuppin Stick}}}},]}} /summon Villager ~-2 ~0 ~0 {Profession:3,CustomName:BLACKSMITH,CustomNameVisible:0,Offers:{Recipes:[ {maxUses:13,buy:{id:388,Count:5},sell:{id:283,Count:1,tag:{ench:[{id:16,lvl:9},{id:20,lvl:6}],display:{Name:Molten Gold Sword}}}},{maxUses:13,buy:{id:388,Count:1},sell:{id:280,Count:1,tag:{ench:[{id:16,lvl:5}],display:{Name:Whuppin Stick}}}},{maxUses:13,buy:{id:388,Count:2},sell:{id:369,Count:1,tag:{ench:[{id:16,lvl:5},{id:20,lvl:10}],display:{Name:Radioactive Whuppin Stick}}}},]}} /summon Villager ~-2 ~0 ~0 {Profession:3,CustomName:BLACKSMITH,CustomNameVisible:0,Offers:{Recipes:[ {maxUses:13,buy:{id:388,Count:5},sell:{id:283,Count:1,tag:{ench:[{id:16,lvl:9},{id:20,lvl:6}],display:{Name:Molten Gold Sword}}}},{maxUses:13,buy:{id:388,Count:1},sell:{id:280,Count:1,tag:{ench:[{id:16,lvl:5}],display:{Name:Whuppin Stick}}}},{maxUses:13,buy:{id:388,Count:2},sell:{id:369,Count:1,tag:{ench:[{id:16,lvl:5},{id:20,lvl:10}],display:{Name:Radioactive Whuppin Stick}}}},]}} . The part called "Buy" is what the farmer is accepting as payment, the part that says "sell" is what he is giving in return. You can change the MaxUses to 1000 if you don't want the offer to run out, or 1 if you want it to be a one-of-a-kind item. Note that the first item out there (the golden sword) has an out of range charm (sharpness 9). If this works, but always research what exactly the enchantment does before doing an out of range one as some things do nothing, or even do negative effects (breathing from "see underwater" side effect makes everything a blinding white at high levels, as if plunged into arctic waters full of Levante). As for the gold sword, keep in mind that gold swords wear out incredibly fast (there's a reason people call them butter swords after all). A level 10 Unbreaking enchantment should bring a golden sword up to a decent durability level. Notice also that the other 2 "weapons" are actually a Blaze stick and cane with weapon enchantments on them. Using any non-weapon as a weapon does the same damage as an empty hand (1 damage, aka half a heart) but the enchantments on these ones make them the equal of an unenchanted sword. Why bother? What is the advantage? Because unlike guns, fire sticks and rods are NOT DURABLE RATED AND WILL NEVER WEAR. The same trick can be used with mobheads and breath 3 to make a diving mask of infinite durability.
In 1.7, the command block gained expanded potential. Namely, the / summon and / setblock commands have been added, and can be used to automatically build structures, fill chests, and spawn entities that were previously unavailable. The command syntaxes are:
/ setblock [datavalue] [oldblockHandling] [datatag] para setblock / summon [x] [y] [z] [DataTag] para convocar
Along with that, the setblock command also allows cheating with disappearing floors and sudden walls.
SETBLOCK EXAMPLES:
- MobSpawners pt 1: The Basics This code will create a zombie mobspawner 2 blocks from you in the x direction. Note that the name given for mobspawners in this code ("minecraft: mob_spawner") is the long version and you can omit the "minecraft:" part.
/ setblock ~ 2 ~ 0 ~ 0 minecraft: mob_spawner 0 reemplaza {EntityId: Zombie}
The following code is pretty basic too, but it includes the 6 basic parameters that can be set.
/ setblock ~ 0 ~ -1 ~ -3 mob_spawner 0 replace {EntityId: Skeleton, SpawnRange: 4, RequiredPlayerRange: 16, SpawnCount: 4, MaxNearbyEntities: 6, MinSpawnDelay: 200, MaxSpawnDelay: 800}
A couple of things to keep in mind: A) All times are in ticks of the game (twentieth of a second). 200-800 is 10 to 40 seconds. B) Keep in mind that they are in groups of 2 and will not work if your partner is missing. SpawnRange requires RequiredPlayerRange (and vice versa), MinSpawnDelay requires MaxSpawnDelay, and I'm guessing SpawnCount needs MaxNearbyEntities (though I haven't actually heard the confirmation from that last one). C) There is also a parameter called "Delay" that contains the amount of time before the next generation (20 ticks for the first time, any random number you choose between MaxSpawnDelay and MinSpawnDelay every other time). D) the given coordinates are ~ 0 ~ -1 ~ -3 (that is, 3 blocks in the negative Z direction from the current command block position and 1 block down). This will presumably embed it into the surface of the floor. Note that the "SpawnRange" settings of the generators only apply horizontally, not vertically. Vertically it will only spawn at the same height or 1 lower or higher, so embedding it into the floor surface reduces the available spawn area by 2/3 (but can help hide it). Naturally occurring players have their height reduced by 1/3 due to 1 block appearing on the floor instead of 2. E) All values used here are defaults.
- MobSpawners pt 2: Custom Monsters Now we go into SpawnData.
Note that the 5 equipment slots are: Hand, Boots, Legs, Chest, Helmet. You must even specify empty slots (the { }, parts) unless they're after the last non-empty slot. So if you want him to have a helmet you have to specify all 5 slots, but if it's just a weapon you can leave off the other 4. Or if you want him to have leg armor you have to specify weapon and boot slots but not chest and helmet slots. By the way, creatures that burn in sunlight are safe if they have a helmet on, although it damages the helmet instead. About the Count tag: most codes can get away with leaving it out, however it is important. An item without a count tag is a stack of zero, better known in the community as a "Ghost Item". A player trying to use a ghost item will have it disappear out of his hands with it's first use (which is a failure). While monsters can use ghost items without problem (hence why codes get away with leaving it out sometimes) if they drop the items the player who picks it up won't be able to use it, SO INCLUDE COUNT!
Next up we have a Skeleton with an enchanted bow (Flame), a custom mobhead (Spider, internet connection required or it's just steve) with Protection 2, and riding a Skeletal Horse.
/setblock ~2 ~1 ~2 mob_spawner 0 replace {EntityId:Skeleton,SpawnData:{Equipment:[{id:261,Count:1,tag:{ench:[{id:50,lvl:1}]}},{},{},{},{id:397,Count:1,Damage:3,tag:{ench:[{id:0,lvl:2}],SkullOwner:MHF_Spider}}],Riding:{id:"EntityHorse",Type:4,Tame:1,SaddleItem:{id:329,Count:1,Damage:0}}}}
Well actually, sitting on a skeletal horse, since the lower creature controls the movement and the horse is not hostile. Don't try the zombies on horseback, they just sit there unsuccessfully while the horse eats grass and snorts. Fortunately, this is a skeleton and it can shoot you from wherever the horse decides to roam. As for the horse itself, it is type 4 (skeletal horse), Tame is set to 1 (yes) and has a saddle (and the fact that they make us specify which saddle suggests that they may eventually have more than one type) . Technically, you can have multiple levels of riders, although this quickly gets silly.
MobSpawners pt 3: SpawnPotentials The use of the SpawnPotentials tag allows us to create a mobspawner with several mobs in it. It will choose one at random every time you reset the timer (one second after spawning the previous mobs). Since these codes contain multiple monsters, they tend to be quite long codes. Thanks to some youtuber whose name escapes me (Dragnoz) it is known that you can "split" your code (command blocks ignore line breaks, so you can start a new line to clarify where a section ends and start another and won don't screw up your code). Here's a more visually pleasing version of a SpawnPotentials code
/setblock ~0 ~1 ~1 mob_spawner 0 replace {EntityId:Zombie,SpawnRange:6,RequiredPlayerRange:12,SpawnCount:1,MaxNearbyEntities:6,MinSpawnDelay:100,MaxSpawnDelay:600,SpawnData:{Equipment:[{id:268,Count:1},{id:301,Count:1},{id:300,Count:1,tag:{display:{color:5013401}}},{id:299,Count:1,tag:{display:{color:6717235}}},{id:397,Count:1,Damage:3,tag:{SkullOwner:Reimac}}]},SpawnPotentials:[
{Type:Zombie,Weight:4,Properties:{Equipment:[{id:268,Count:1,Damage:58},{id:301,Count:1},{id:300,Count:1,tag:{display:{color:5013401}}},{id:299,Count:1,tag:{display:{color:6717235}}},{id:397,Count:1,Damage:3,tag:{SkullOwner:Reimac}}]}},
{Type:Skeleton,Weight:2,Properties:{Equipment:[{id:267},{id:301,Count:1,tag:{display:{color:1644825}}},{id:300,Count:1,tag:{display:{color:1644825}}},{id:299,Count:1,tag:{display:{color:1644825}}},{id:397,Count:1,Damage:3,tag:{SkullOwner:2insanepeople}}]}},
{Type:Zombie,Weight:4,Properties:{Equipment:[{id:272,Count:1},{id:305,Count:1},{id:304,Count:1},{id:303,Count:1},{id:397,Count:1,Damage:3,tag:{ench:[{id:0,lvl:2}],SkullOwner:Flixnore}}]}},
{Type:Zombie,Weight:4,Properties:{Fire:2400,Equipment:[{id:283,Count:1,tag:{ench:[{id:20,lvl:1}]}},{id:317,Count:1},{id:316,Count:1},{id:315,Count:1},{id:86,Count:1,tag:{ench:[{id:0,lvl:2},{id:1,lvl:10}]}}]}},
{Type:Zombie,Weight:4,Properties:{Equipment:[{id:267,Count:1,tag:{ench:[{id:16,lvl:2}]}},{id:309,Count:1},{id:308,Count:1},{id:307,Count:1},{id:397,Count:1,Damage:3,tag:{ench:[{id:0,lvl:2}],SkullOwner:2zqa}}]}},
{Type:Zombie,Weight:1,Properties:{Equipment:[{id:278,Count:1,tag:{ench:[{id:16,lvl:4},{id:17,lvl:4},{id:18,lvl:4},{id:21,lvl:3},{id:34,lvl:3}]}},{id:313,Count:1,tag:{ench:[{id:1,lvl:4},{id:2,lvl:4}]}},{id:312,Count:1,tag:{ench:[{id:3,lvl:4}]}},{id:311,Count:1,tag:{ench:[{id:0,lvl:4}]}},{id:397,Count:1,Damage:3,tag:{SkullOwner:MHF_Herobrine,ench:[{id:0,lvl:4},{id:1,lvl:4},{id:3,lvl:4},{id:5,lvl:3},{id:6,lvl:1}]}}],CustomNameVisible:1,CustomName:Herobrine,PersistenceRequired:1}},
]}
Wow, that's a mouthful! But then it's 6 separate mobs. In order we have: 0) Before the "SpawnPotentials" tag: the initiator, which will never appear again after the first time. If we want to see it again we have to include it a second time in SpawnPotentials. He's just a random guy in bluejeans (dyed blue leather leg armor) and a cactus green shirt (dyed green leather tunic) with a wooden sword. He's a zombie under that random mob head of hers, of course. They all are. 1) Same random thing, only this time his wooden sword is 2 hits away from breaking. 2) Hey, who let a ninja into the game? This is a skeleton under his mask, but he has been given an iron sword. All of his leather armor is dyed ninja black. Skeletons with swords close the gap faster than zombies, so be careful. 3) Type of Stone Sword and Chain Armor. Protection II on your mobhead. 4) One of my favorites. Golden sword, golden armor, pumpkin helmet and IN THE FIRE !!! I originally wanted to give him a flaming pumpkin helmet, but I noticed that the fire tag only applies to entities, not armor. The pumpkin is enchanted with Protection II and Fire Resistance X (10!) In a desperate attempt to keep it upright and threatening the player for more than 5 seconds. It works, but if the player plays from a distance, Mr. Pumpkinhead tends to burn to death. Oh, his sword also looks like fire. 5) The type of the Iron Sword and the Armor. Sharpness II and su espada, Protection II and su mobhead. 6) Type of Weapons and Diamond Armor. Wait who is that. It ... is that ... ¡Oh, Em Gee, es! Run! ... No, of course it's not really him. Because it does not exist. FakeHB here has highly enchanted diamond armor (IV fire protection boots and IV feather drop, IV blast protection leggings, IV protection chest plate, IV protected mob head, IV fire protection, IV protection explosions IV, breath III) and an enchanted diamond pickaxe. con Sharpness IV, Smite IV, Spiderbane IV (oh, bueno Bane of Arthropods IV, ¿estás feliz?), Looting III e Unbreakable III. It also has the previously unseen CustomNameVisible (set to 1 for yes), a CustomName, and PersistenceRequired (set to 1 for yes). The latter will prevent it from ever disappearing, although it can be killed normally. If you can get through that diamond armor. And level 4 resistors. Fortunately, it is rarer (see below). than the ninja, it is a direct tour of the 5 levels of swords and armor. Notice the weight tag, which is used after the mob's name in every SpawnPotential. That determines how rarely it is harvested. Specific numbers mean nothing, just the relationships between the numbers. For example, if you want all potentials to have the same probability, just set all weights to 1. Changing them all to 8 would do nothing different (they are all still the same size), but changing all but one to 8 would make it 1/8 more likely than the rest. In this code 4 is the default.
The player can make a kind of world guard using the command block. (for example, code: / gamemode @a [r = ]) Using the radio argument with a teleporter connected to a clock circuit can be used to create an exclusion zone ("force field") around an xyz coordinate (which must not be centered on the command block in yes, otherwise it will be difficult to edit or disable it later). Just program it to teleport any player within a certain range to a further point, or just go back 0 meters using relative coordinates. Note that such a force field would not know which direction it is approaching from and may result in drawing a player before pushing them to the other side. The / say Hello, @p, / tell @p Hello, @py / me Hello, @p commands will make the command block say the username of the closest player in the message. You can also delete player inventories, to avoid dueling and / or cheating: / delete
Spawners
Command Blocks can create generators using the setblock command, for example: / setblock ~ 1 ~ -1 ~ 0 mob_spawner 0 replace {EntityId: Zombie, SpawnData: {Equipment: [{id: 276, Count: 1}]}} Anything which counts as an entity can be spawned (except a player), which includes all hostile, neutral and passive mobs, as well as animals, mining carts, fireballs, arrows, snowballs, ender pearls, custom potions, fires man-made, prepared TNT, falling sand or gravel, paintings and object frames, experience spheres, and even fallen objects of any kind.
Pig / cow / chicken breeders can be placed in the butcher's backyard in a village to create a constant supply of meat. For example: / setblock ~ 1 ~ -1 ~ 0 mob_spawner 0 replace {EntityId: Chicken, MaxNearbyEntities: 10, RequiredPlayerRange: 16, SpawnCount: 6, SpawnRange: 2, MinSpawnDelay: 50, MaxSpawnDelay: 200, SpawnData: {Riding: { id: "Pig"}}} Note that the generator in the last code example will generate a chicken mounted on a pig. There doesn't seem to be a limit to the number of riders you can use (eg, a chicken riding a pig riding a cow riding a horse riding a silver fish riding a villager ("Tell me, that's a very strange hat you have, Farmer Brown ")). Note that if you want to use the RequiredPlayerRange tag you have to use the MaxNearbyEntities tag as well. Same deal with MinSpawnDelay and MaxSpawnDelay. Lastly, note that the value of y used in both generator example codes was ~ -1, which (assuming you are not flying) will place the generator on the ground surface level at your feet.
If you don't want to target a specific player, you can use @a, @po @r instead of . Note that you can use @p (which stands for "closest player") in player-issued commands as an easy-to-type 2 character replacement for your own name, since the player closest to you will always be you. Booby traps
The deadliest booby trap would be a command block set up to teleport someone into a void.
As of 1.8, you can do / kill @e [r = 2] in a command block below a block with a pressure plate to make a multipurpose landmine that kills all nearby entities by stepping on it (including players, item frames and paintings)
Note that booby traps using @p can be dangerous due to the fact that non-player entities could activate them (if something like a pressure plate is used), resulting in teleportation of the closest player, no matter how far away they are. and regardless of the fact that they haven't actually stepped on the plate. To avoid this, you can use the / testfor command as an invisible pressure plate. Connect a clock circuit to a command block programmed with / testfor @p [x = 50, y = 64, z = 46, r = 65536], with the coordinates changed accordingly. Note that as of 1.8 you can now specify a range of zero. Teleporters
It is possible to make teleporters using the command block. (eg code: / tp @pxyz) Going one step further, a teleportation station can be made, with multiple button-activated teleporters each teleporting to different locations. It's wise to explore and test teleportation destinations first, to make sure players don't end up trapped inside blocks or other unwanted locations. If it appears on the ground while testing the coordinates, use / tp @p ~ 0 ~ 8 ~ 0 to exit (may require multiple uses).
If you use the teleport command with the command block, you can use relative coordinates in the destination coordinates by placing a ~ in front of a Coordinate (for example, code: / tp @p ~ 0 ~ 8 ~ 0 This will teleport the player 8 blocks within the Air).
Commands that use coordinates (for example, / tp or / spawnpoint) add 0.5 to whole numbers when no decimal follows. This is to make it appear centered on the block it appears in rather than on the edge or corner of it. For example, the number -33 would run as -32,5 and 187 as 187,5. To work around this behavior, add .0 (25.3, 90.0) after them, as these values run as is.
| Minecraft tutorials | |
|---|---|
| Beginnings of the game |
|
| General |
|
| Mining |
|
| Farms |
|
| Mechanisms |
|
| Technical Assistant |
|
| Outdated |
|
Adriana gil We are a specialized and passionate team of virtual reality. We have extensive experience in this area. We decided to create ForVirtualRealityLovers to share all our information with customers and users. We have quality information. You can find tips, guides, interviews, top products and much more! If you are curious, enter our site ForVirtualRealityLovers.com and discover the virtual world! ? Iron Ingot ❯
Articles related to

Cooked steak

Turntable
Exit portal
Cartography table
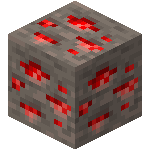
Mena de redstone